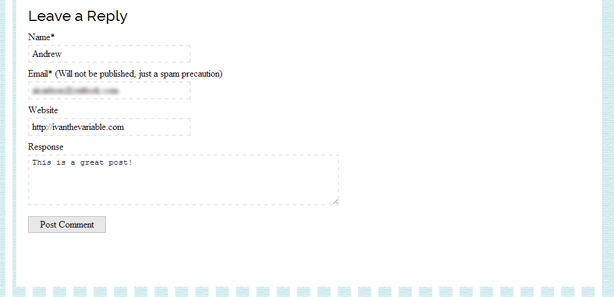
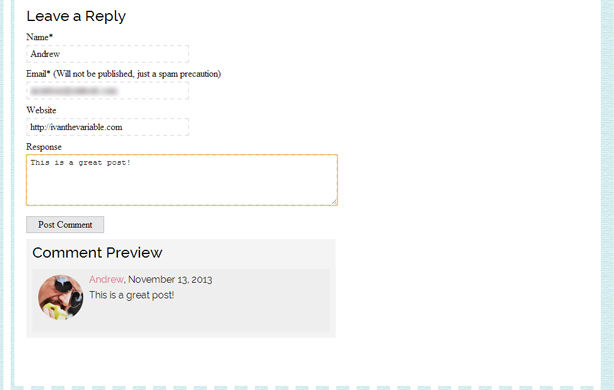
I recently saw something really cool over at http://css-tricks.com, which by the way is an excellent resource for all sorts of HTML/CSS/Javascript tricks and tips. If you go to comment on any of the individual posts, it will pop up a preview of what your comment will look like complete with your Gravatar, website URL, and comment text etc.
I really liked the way it worked and decided to take a shot at creating something similar. I was pleasantly surprised by how quickly it came together.
Adding the proper HTML to your comments.php
We’ll need to add a bit of HTML to your comments.php to display the blank preview box, as well as the preview as you’re filling out the content box itself.
<div class="commentPreview">
  <h3>Comment Preview</h3>
  <div class="theComment">
    <?php echo get_avatar( 'email@example.com', $size = '75'); ?>
    <div class="preview-content">
      <div class="preview-meta">
        <a href="" class="preview-url"></a>, <?php echo get_the_date(); ?>
      </div>
      <div class="preview-text">
      </div>
    </div>
  </div>
</div>
This is just some basic HTML that tells the page to display an area of your page as a preview box. Nothing too magical happens here. We’re essentially just creating a box for the content to fall into.
You can style it up to match your theme or add elements as you see fit! The trickiest thing here is just the Gravatar line:
<?php echo get_avatar( 'email@example.com', $size = '75'); ?>
This tells WordPress to include a blank Gravatar by default. You can change the default image in your ‘Discussion’ Settings in your WordPress admin.
JavaScript for the Live Preview
Now for the real magic. We’ll be making use of jQuery and a nice Google Hosted JavaScript encryption plugin called Crypto-JS. Be sure to wp_enqueue both of these files properly in your functions.php! If you don’t know how to do this, check out my previous post on wp_enqueue’ing in WordPress.
Once you’ve enqueued the two scripts mentioned above, include the following JavaScript on the page below wherever you declare your jQuery. I would recommend having a separate file such as a ‘global.js’ that includes all of the JavaScript for your site.
If you don’t have that, you could include this code in your footer.php, header.php or comments.php as long as it’s below the references to jQuery and Crypto-JS.
jQuery(document).ready(function() {
    jQuery('.commentInput').each(function() {
      jQuery(this).val('');
    });
    jQuery('.commentInput').change(function() {
      var author = jQuery('#author').val();
      jQuery('.preview-url').text(author);
      var email = CryptoJS.MD5( jQuery('#email').val().toLowerCase().trim() );
      jQuery('.commentPreview .avatar').attr('src','http://gravatar.com/avatar/' + email);
      var url = jQuery('#url').val();
      jQuery('.preview-url').attr('href',url);
    });
    jQuery('textarea.comment').keyup(function() {
      var comment = jQuery(this).val();
      jQuery('.preview-text').html(comment);
    });
  });
The only think you’ll potentially have to swap out here are #author, #email, #url and textarea.comment. Those are the identifiers that my comment form is using. You’ll need to look at the code to find the specific classes or id’s that your comments are using on the respective inputs.
Preparing the Document
Let’s go through the Javascript function by function:
jQuery(document).ready(function() { });
This function tells your code to be prepared to run by the time the DOM is ready. It’s important to wrap your Javascript/jQuery in this to prevent script collisions. But wait, why are we using jQuery rather than $?
Essentially, WordPress is already using the typical jQuery $ in another scripting library, so it won’t work to preface your jQuery scripts with it. Therefore we need to use jQuery as our element selector.
Clearing any leftover data
jQuery('.commentInput').each(function() {
  jQuery(this).val('');
});
Here we iterate through each of the comment form inputs that have a class ‘commentInput.’ Then for each of those we set a blank value. This is like a reset on the form, so that it works consistently from page to page.
Capturing the Author, Email and URL
jQuery('.commentInput').change(function() {
  var author = jQuery('#author').val();
  jQuery('.preview-url').text(author);
  var email = CryptoJS.MD5( jQuery('#email').val().toLowerCase().trim() );
  jQuery('.commentPreview .avatar').attr('src','http://gravatar.com/avatar/' + email);
  var url = jQuery('#url').val();
  jQuery('.preview-url').attr('href',url);
});
This portion is relatively straightforward. First, we look for a change on any of the inputs with the class ‘commentInput.’ Then if there is a change, we set variables for author, email and url containing the respective value of each of the inputs.
To add the ‘author’ portion of the preview, we simply add the value of author to the HTML element we created above with the class ‘preview-url’ using jQuery’s .text().
To add the ‘url’ portion of the preview, we want to replace the default blank href attribute with the URL that the user has entered. We’ll do this using jQuery’s .attr().
The toughest portion of this function is the email. Gravatar requires the email to be lower case, trimmed (no white space before or after) and then hashed using MD5. Unfortunately JavaScript doesn’t include any built in encryption for MD5. Thankfully, CryptoJS exists.
var email = CryptoJS.MD5( jQuery('#email').val().toLowerCase().trim() );
So reading from inside to out, we’re going to take the value of the input with the ID ’email’, then we’ll lower case the value, and trim all white space before and after. Then we’ll wrap the whole shebang in CryptoJs.MD5();.
This returns a MD5 hash of the string that the user entered so that we can grab their avatar from Gravatar.com! Thankfully the URL structure for the avatar is pretty simple. We’ll just use .attr() again and set the src attribute to contain ‘http://gravatar.com/avatar/MD5-Hashed-Email.’
The comment message
jQuery('textarea.comment').keyup(function() {
  var comment = jQuery(this).val();
  jQuery('.preview-text').html(comment);
});
The comment message is a little different. With the various inputs we just wanted to capture the input on a change. This is because we don’t want incomplete data for something like the email or URL. However with the comment itself, we’d like it to show up as the user is typing!
So for that we’re going to use a keyup function. This runs every time a key is released inside the textarea, thereby providing a real-time preview of what the comment will look like!
You’ll notice that we’re also entering this text into the comment area using .html() rather than .text(). This is more for looks than anything else. This way if a user enters a link or bolds some text in their comment using HTML it will carry over to the preview.
And there you have it! Comment previews that update dynamically as the user is typing the comment! This clearly doesn’t watch for validation or anything like that, and is intended more for the purpose of demonstration than anything else.
You can also check out the code’s GitHub repo if you want it all at once!
So what do you think, would you like to see a preview of your comment as it’s being typed? If you want to see this in action, check it out on any of the posts pages on Molliepop.com!